Friday, 27 March 2015

IT'S SPRING AGAIN!!!!! :o) :o) :o)

HELLO EVERYONE!
HOPE ALL'S WELL WITH YOU.
ISN'T IT LOVELY TO SEE THE DAFFODILS AGAIN! THEY ALWAYS HERALD, FOR ME, SIGNS OF WARMER TIMES TO COME!

THOUGHT THAT I WOULD SHARE PHOTOS WITH YOU OF THE CHRISTENING CAKE I MADE FOR OUR THIRD, BEAUTIFUL & PRECIOUS GRANDDAUGHTER'S BAPTISM AT THE VERY BEGINNING OF MARCH. (SHE WAS BORN ON OCTOBER 21ST 2014). :o)
ALL THE FAMILY CAME UP TO CUMBRIA TO CELEBRATE WITH US - BUT! - IT WAS THE SUNDAY WHEN WE EXPERIENCED THE ONLY, HEAVY SNOWFALL THAT WE HAVE HAD LATELY!!!!! & UNFORTUNATELY, MOST PEOPLE HAD TO LEAVE FOR HOME BEFORE DESSERT TIME AT THE BUFFET AFTER THE SERVICE!
I'M PLEASED TO SAY THOUGH THAT EVERYONE ARRIVED HOME SAFE & SOUND -PLUS- THERE WERE LOTS OF DESSERTS LEFT WHICH WE ENJOYED OVER THE ENSUING DAYS & AT LEAST EVERYONE WAS HERE TO SHARE IN WHAT WAS, A VERY, SPECIAL CHRISTENING SERVICE :o)


I ALSO BAKED A MINI CAKE FOR MY MAM FOR MOTHER'S DAY ------- SHE WAS DELIGHTED WITH IT!


 TAKE CARE ALL & HAVE A WONDERFUL SPRING!


Monday, 6 October 2014

GREETINGS!

Hello Everyone,

Sorry I haven't been on here for a while - I have not been idle though.
I have recently completed my eldest nephew's wedding cake for his wedding which is this Thursday Oct. 9th 2014! I have also been crocheting for our impending 3rd grandchild who is due on Oct. 17th 2014 :o)

Chester, our little dachsie, has turned into the most adorable pet! He is such a character - he does not surface from his bed on a morning until around 10.30am - sometimes later!!! He buries himself completely under his duvet, so much so, that you cannot tell he is even there!
He is gentle & playful & can sit up & beg for Britain! I find it hard to resist him - he also likes to shimmy up behind my neck when I am on the laptop or crocheting. He curls himself around the back of my neck with his head on my shoulder like a mink stole ha ha ha!

Some photos for your perusal ------


Tuesday, 14 January 2014

BEST WISHES FOR 2014!!!!

Hello All,

I hope that you had a very happy Christmas & I wish you all a very happy new year if somewhat a little belated!
We had a fabulous Christmas - plenty of R & R & family get togethers - it is sad though how quickly it is all over with after all the planning & build up to it & how bare our homes look once the tree etc have been taken down! :o(

We are having  a rather wet winter, but fortunately seem to have escaped the flooding which has taken over rather a lot of the UK. We have only had 3 mornings when our car windscreens have been frosted, so it has also been rather a mild winter up till now.

There are wonderful signs that spring is hot on winter's heels - our snow drops are ready to flower soon & my little pots of Tete a Tete are springing into life :o) The days are getting a little longer too thank goodness!
 
I thought that you might like to see a photo of dear Chester in his Christmas bandana which I made for him & also the little, knitted teddy bear I made for my youngest Granddaughter Eleanor! So with that I shall say TTFN ---------


Sunday, 3 November 2013

LONG TIME NO SEE ------

LONG TIME NO SEE


Hello everybody!
I must apologise profusely for being absent for so long! I have not however, been idle!
I have been enjoying the arrival of our second beautiful Granddaughter, Eleanor who is just wonderful & like our first Granddaughter Molly, is giving us so much fun & pleasure :o)
We have also welcomed into our hearts & home, Chester,  a gorgeous, shaded red miniature dachshund pup! VOILA! -------

I have just finished working on a Christening shawl for Eleanor - the pattern is all my own work which I am sooo pleased with! Hopefully, I will write the pattern up soon & share it with everyone!
I also made another cake for a friend's daughter in law's graduation...........
 
 
The little mortar boards were made from black sugarpaste & I made the little tassels from embroidery thread ---- very fiddly, but they turned out well I think. The little rosebuds are made from sugarpaste too.
 
 
I am also working on Eleanor's Christening cake. I have made a large, square rich fruitcake. It has been marzipanned & iced & I started on the decorations yesterday. I shall share a photo of it when it is completed!
I have also made our Christmas cake - again, I shall share a photo at a later date.
 
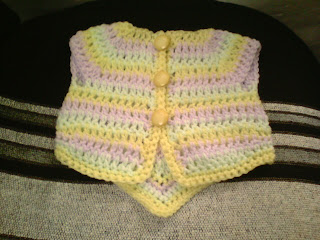
I have also been pattern testing for my lovely eldest daughter, Laura - 2 hats & a little waistcoat .........


She is a very talented designer & her patterns can be found on Ravelry (LollysCC) or on her blog ---
 
I have also been testing for a dear friend Rosella. She too can be found on Ravelry (ROSELLATINN) or on her blog ---  http://woollycluck77.blogspot.co.uk ------- A ruffle butt chicken & a lovely jumper......


Well, I'd best toddle off & get cracking on the dinner!
Hope everyone is well.
Hope to chat again soon!


Saturday, 12 January 2013

Winter ribbed neck warmer


Hi everyone,
Here's a simple but cosy neckwarmer for those cold winter nights ------
 

Winter Ribbed Neck Warmer


American Terminology
Hook size 7 (K – L)
Abbreviations : CH chain    SC Single Crochet    SCBLO Single Crochet Into Back Loop
Only SK Skip    BH Button Hole   ST Stitch  STS Stitches FO Fasten Off    RPT repeat
Yarn Chunky/Bulky (Lifestyle Chunky in Volcano)
TO START : CH 98
Row 1      SC into 2nd CH from the hook & every ST across
Row 2       *CH 1 (acts as 1st SC) SCBLO of every ST across*
Row 3–5    RPT from * to *
Row 6           (Buttonhole Row) CH 1 SCBLO of the first 20 STS. To Make the buttonhole :                  CH2 SK the next 2 STS SCBLO of all the remaining STS
Row 7–10  RPT row 2 incorporating the 2CHS of the buttonhole by SCBLO of each CH.
Row 11          CH1 & SC into each ST across (NOT into the back loops this time) Do not fasten off.
Neck Warmer Edging
CH1 SC into each ST all around the outer edge of the Neck Warmer putting 2SC into each corner ST.
Fasten off.
Attach a button.

The pattern, information & image therein, remain the soul property of Ann Holden.


Friday, 19 October 2012

THE CHRISTMAS FAIR!

Myself & my daughter have a Christmas Craft fair coming up in November, so I am busy crocheting items for our stall.


Here are a few of the things that I have made ,,,,,, but I still have lots to do!!!!!!

Saturday, 25 August 2012

FAIRY BLOSSOMS HEADBAND


Hello again,
Another pattern for you to try & sooo easy. The pattern is suitable to follow for any size head too!
 
I designed this for my lovely Granddaughter's Christening to match the shawl I made for her.
Fairy Blossoms Headband 
 

Terminology: American        Hook Size: 3.25mm (D)       Yarn: Double Knitting (8ply) 

 Ability Level: EASY

Abbreviations : CH – CHAIN  CHS – CHAINS  SC – SINGLE CROCHET  DC – DOUBLE CROCHET  SS – SLIP STITCH  ST – STITCH

Before you begin! : Measure the circumference of the recipients head!

Please Note: This pattern is for a baby with head circumference of 41cms BUT ANY SIZE CAN BE MADE & THE INSTRUCTIONS (APART FROM THE NUMBER OF CHAINS) CAN BE FOLLOWED EXACTLY!

TO BEGIN: **CH 85

Round 1:  SS into 5th CH from the hook. This forms the inner circle for the blossom!  CH2. SC into this circle 9 times (being careful not to incorporate the long length of foundation CH). SS into the first ST that you worked (i.e. the CH2 you began the circle with).  CH1 & DC into this same ST (1st petal made). SS to next ST. * SC into the next  ST & DC into the same ST (2nd petal made) SS to next ST. *

 RPT from * to * making your last SS into the first ST you began this round with, making a total of 5 petals. Fasten off. **

You will now make another two of these CHS/Flower bands  in exactly the same way following the instructions  from ** to **

You will now have 3 CHS/BANDS with blossoms attached!

Putting it all together! :o)

Take your first two bands. Place them side by side with both foundation CHS facing the same way. Now offset the blossoms so that one is slightly below the other one & the bottom of one petal from the first higher CH is just touching the top petal from the lower blossom (See PHOTO below) These petals must not be the ones where the foundation CH starts or the blossoms will not sit right.

Do exactly the same with the remaining CH, again slightly offsetting the blossom below the blossom on the second CH.

Now, line up the CHS so that they all run in a parallel fashion & attach the loose end of each CH behind each corresponding blossom making sure that it is running in line with the CH already attached to each blossom so the CHS are all equal in appearance with approx. 2.5cms (1inch), in between each CH as in the above PHOTO.

TO FINISH : Sew in loose ends & attach a pearl, bead or sequin into the centre of each blossom.

The headband is now ready to wear! :o)

All contents enclosed in this document are the sole property & copyright of Ann Holden.